Add & manage your event website pages
Before you start
You'll need access to the event with a role that can edit the website (Event Manager or above). Open your event, and in the left sidebar make sure you're in Event website → Website pages. This is the tab that lists every page on your event site.
Create a new page
-
Open the Website pages list
From your event, go to Event website in the left sidebar. The Website pages tab shows all your pages (for example: Welcome, FAQ, Venue, Photo Gallery, Partners | Sponsors).
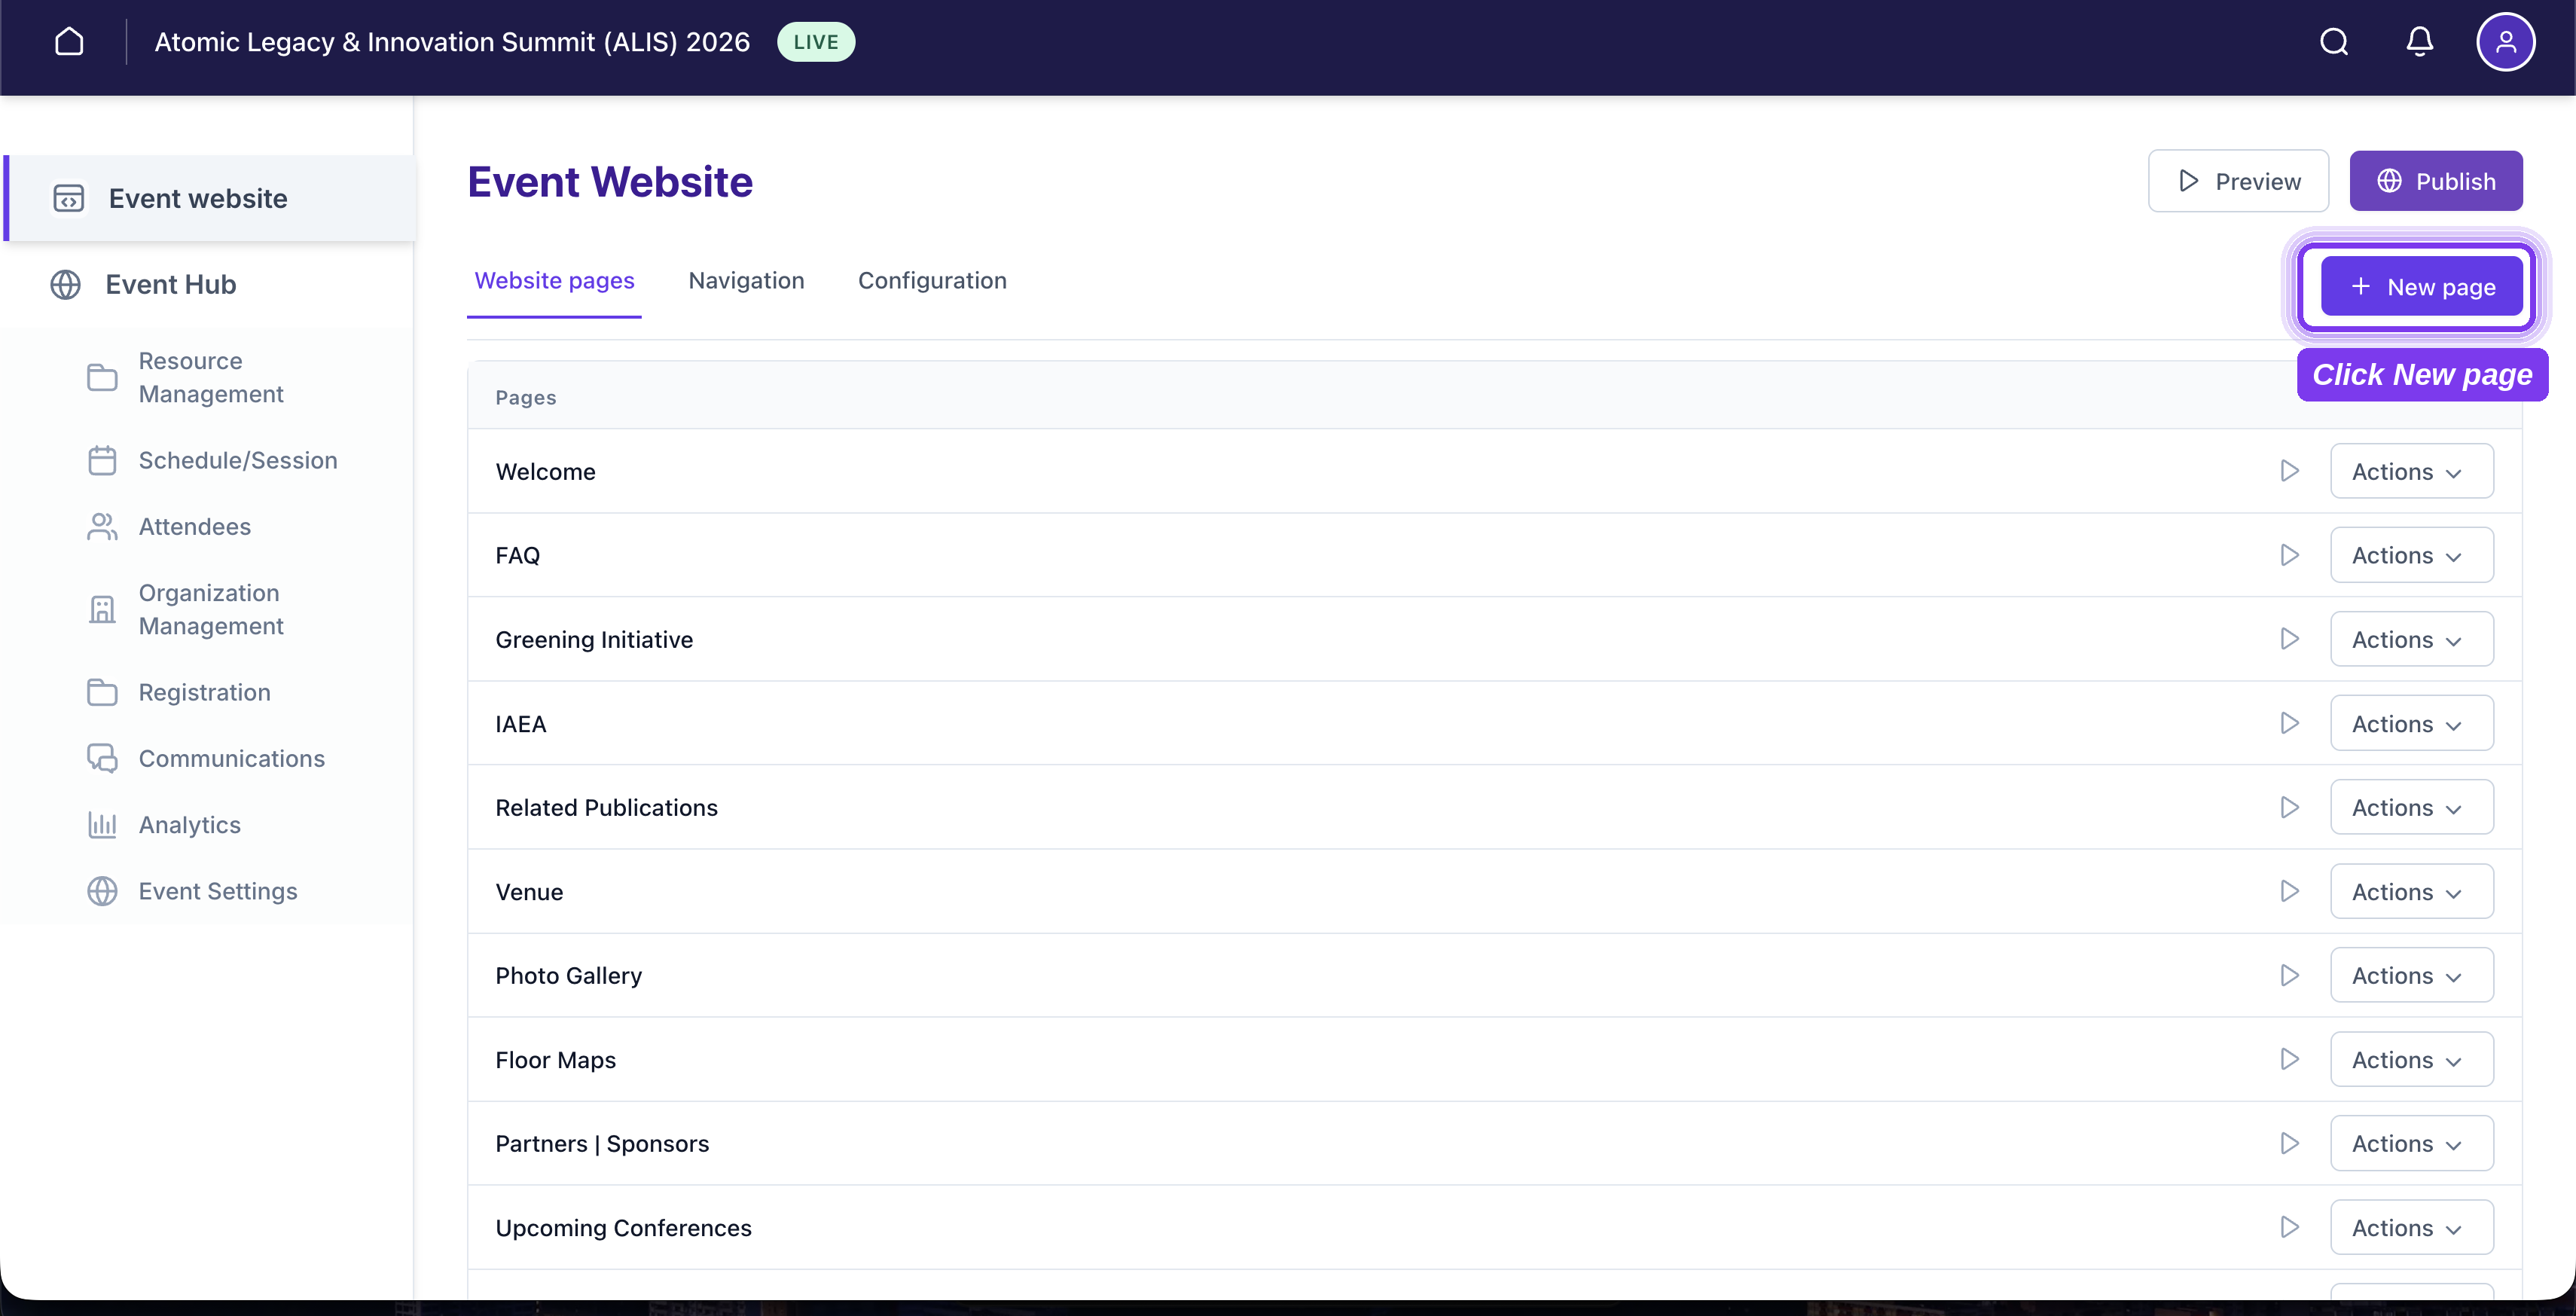
The Website pages tab lists every page, with a preview icon and Actions menu on each row. -
Click New page
At the top right, click + New page. A dialog appears with two choices:
- Create from scratch — build a custom page in the editor.
- Folder — create a folder to group related pages together.
Choose an option and click Select.
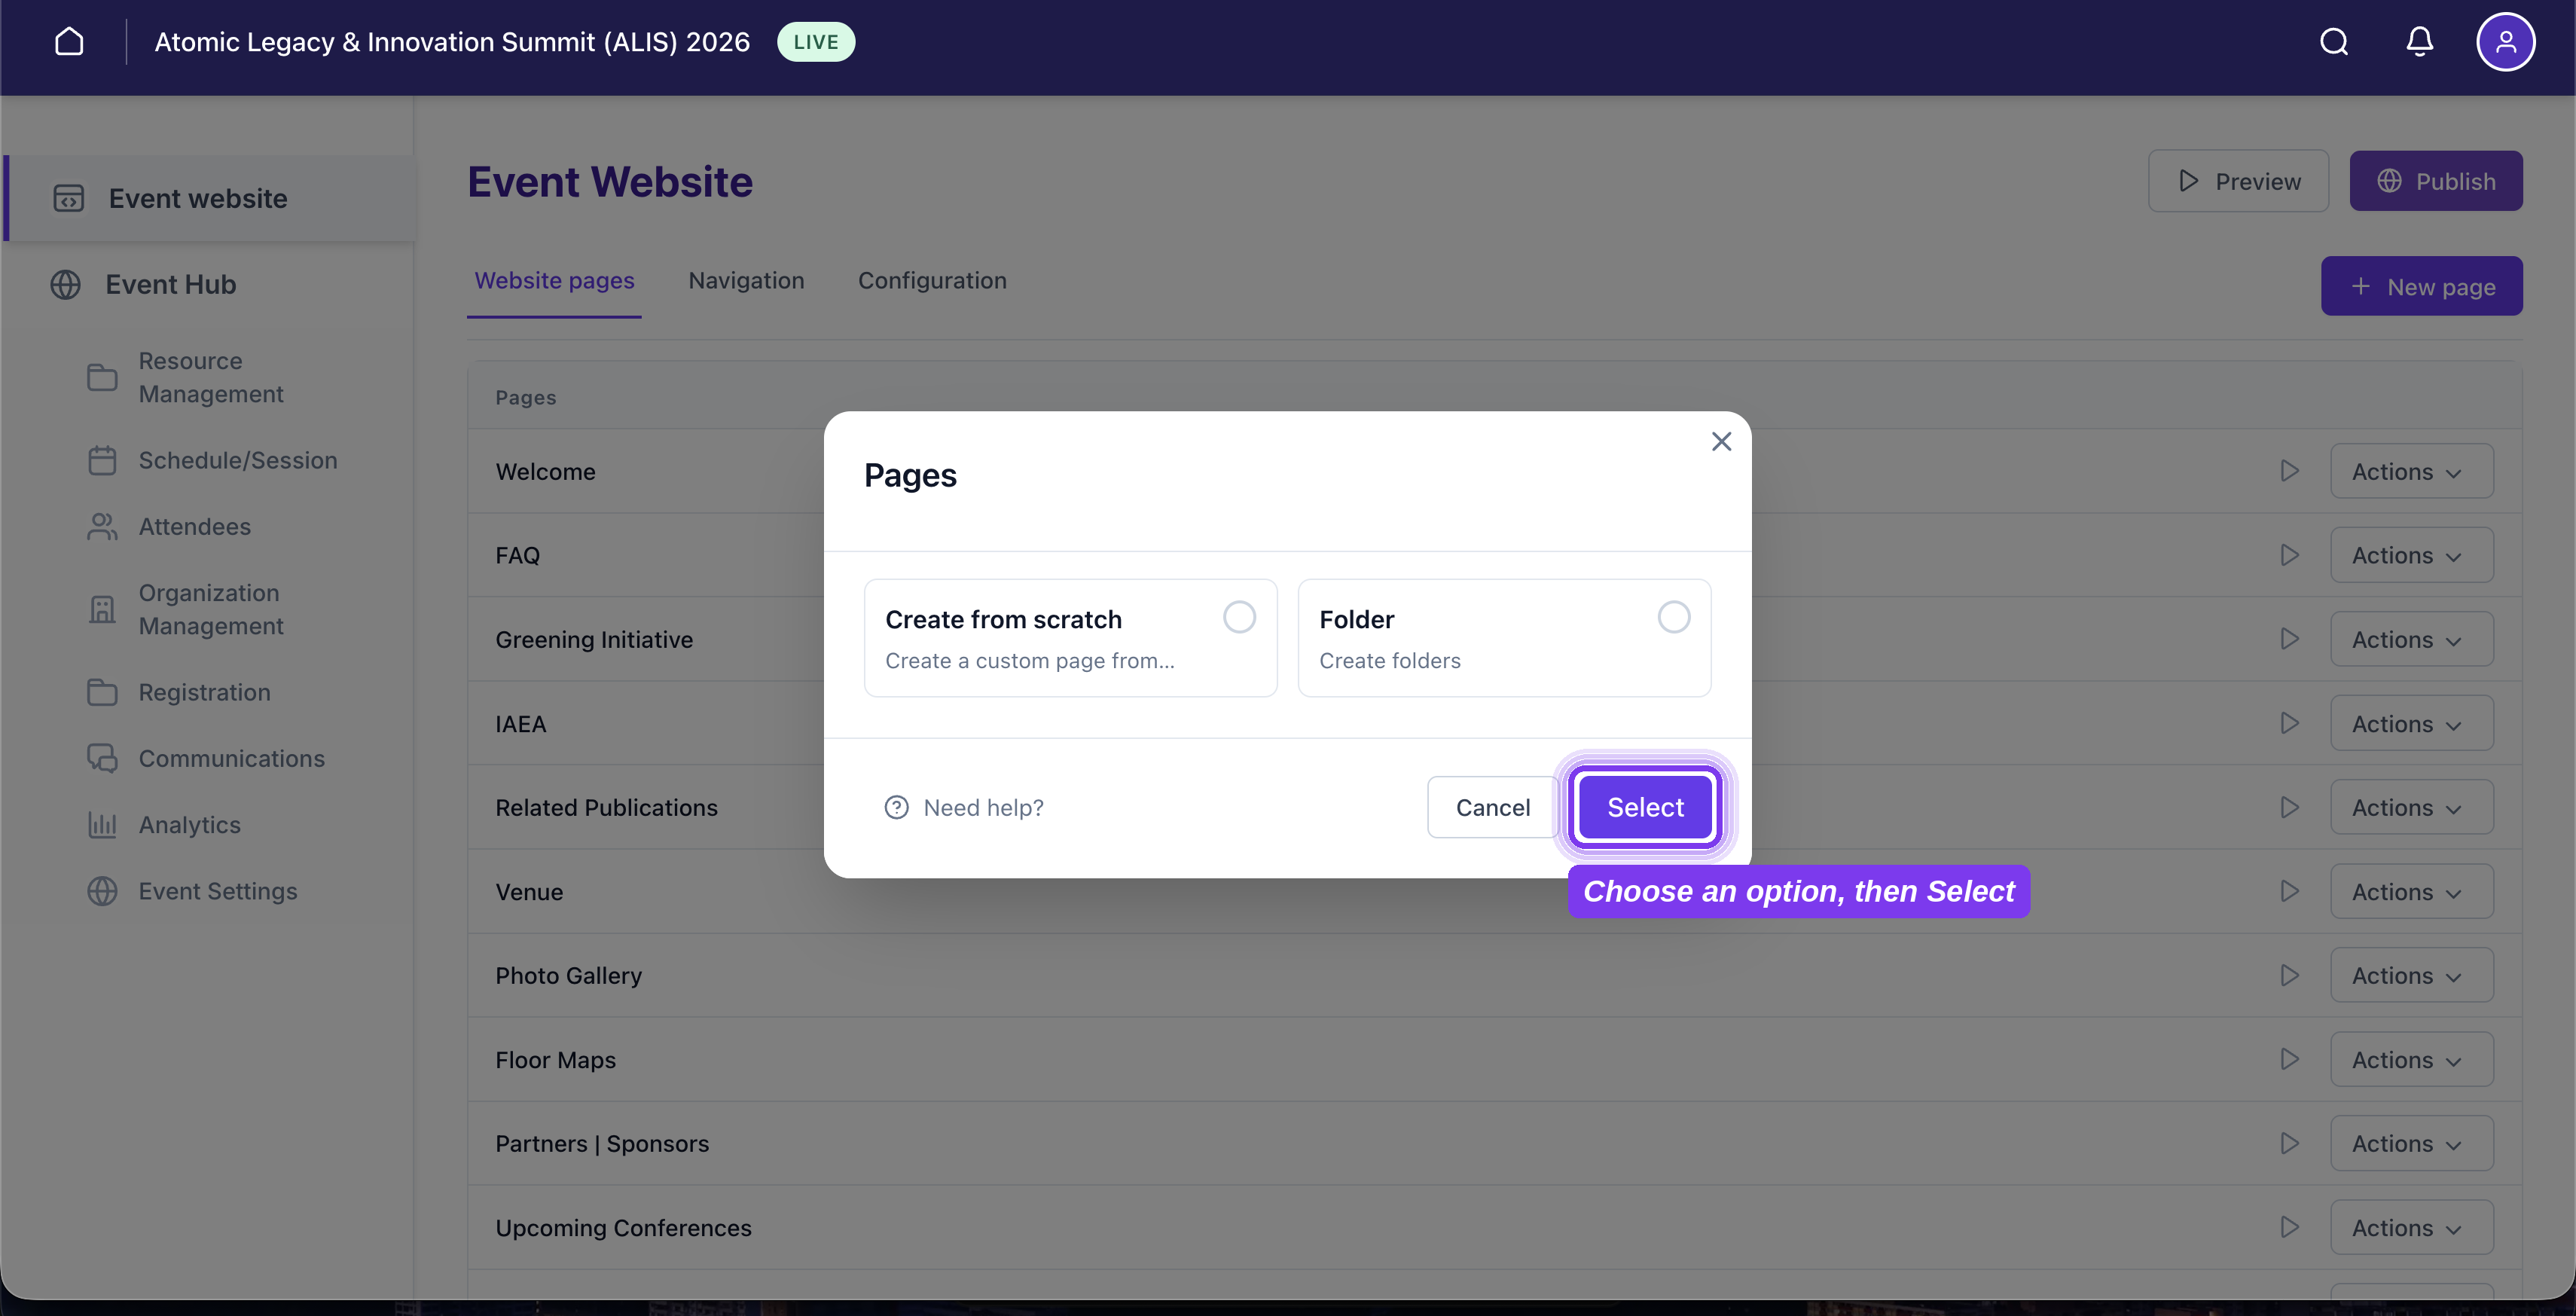
Choose "Create from scratch" or "Folder," then click Select. -
Give the page a title
In the editor, set the Page Title in the right-hand panel. This is the name that identifies the page in your list and (depending on your navigation settings) in the site menu.
Build the page in the editor
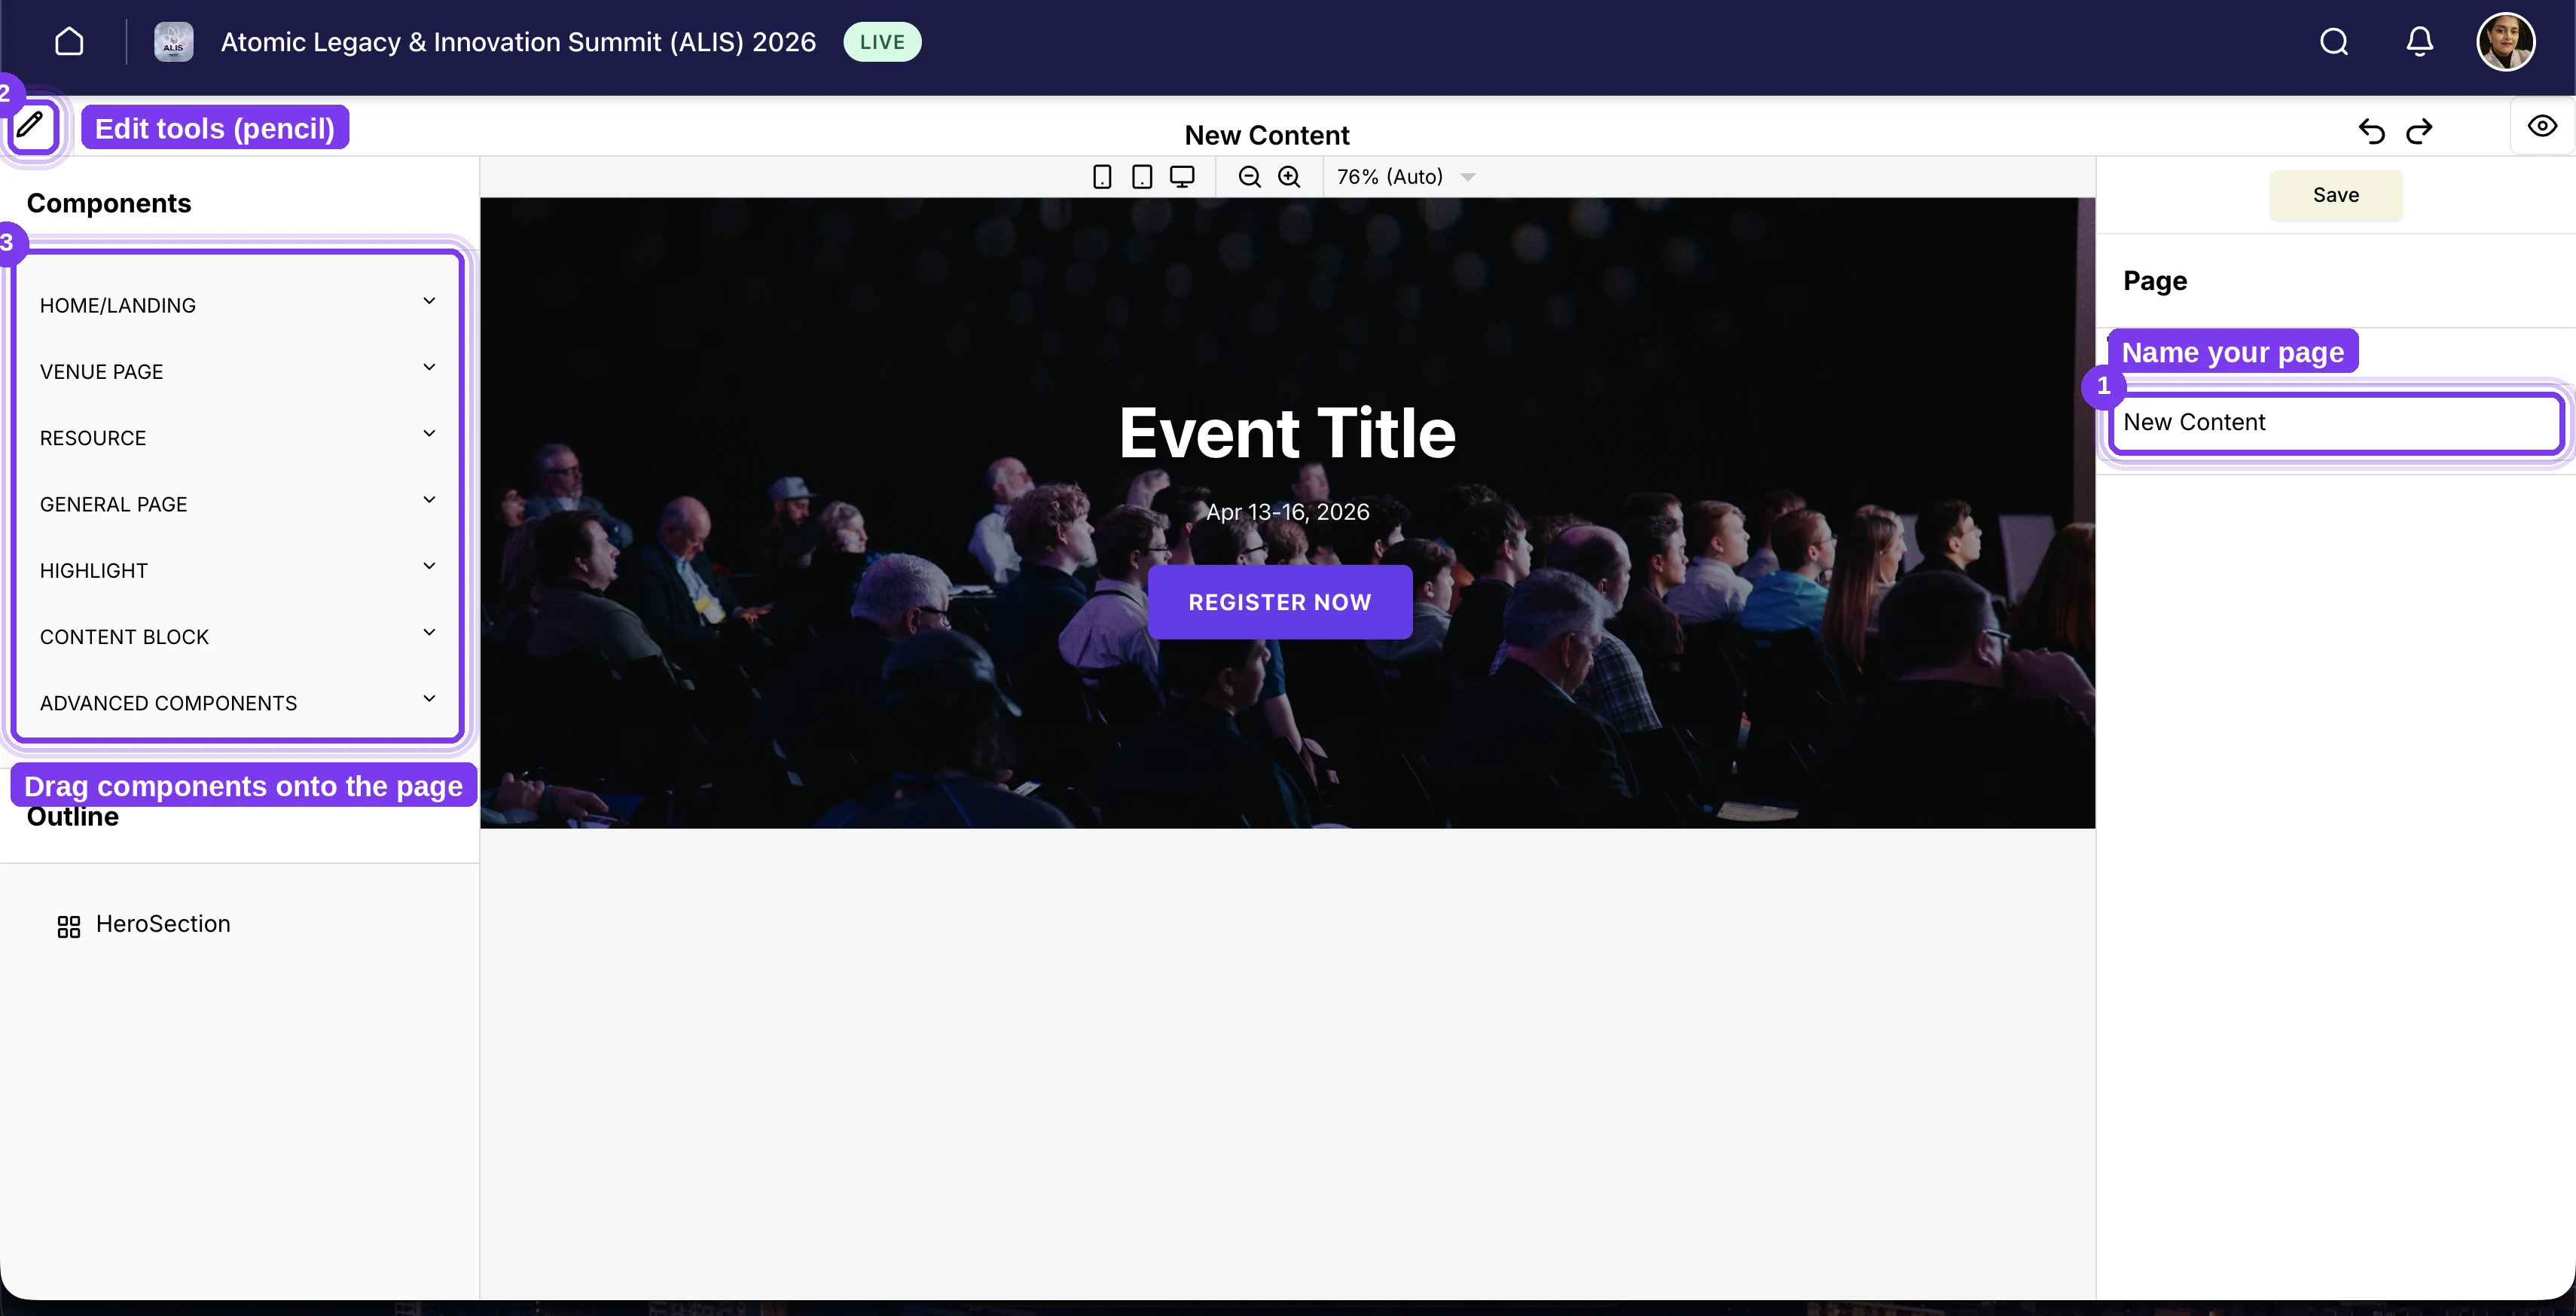
The page editor is a no-code, drag-and-drop builder. It has four parts:
- Components (left) — grouped blocks you drag onto the page: Home/Landing, Venue Page, Resource, General Page, Highlight, Content Block, and Advanced Components. Content Block includes Heading, Text, Button, Divider, Spacer, Link Embed, and HTML Inline.
- Outline (left, below Components) — the list of blocks currently on the page, so you can see and jump to its structure.
- Canvas (centre) — a live preview of the page. Use the device icons to preview mobile / tablet / desktop, and the zoom controls to fit.
- Settings (right) — options for the whole page or the selected block, including the Page Title.
-
Name your page
In the Page settings panel on the right, type a name into the Page Title field. This is how the page is labelled in your website's navigation and in the pages list.
-
Click the pencil (edit) icon
Use the pencil icon at the top-left of the editor to open the editing tools. From here you can add, move, and adjust the blocks that make up the page.
-
Drag and drop components, then customise them
Open a group in the Components palette on the left (e.g. Content Block) and drag a block — such as Heading, Text, or Button — onto the canvas where you want it. Then select any block and customise its content and style in the right-hand settings panel. Use the device preview icons at the top to check how it looks on mobile, tablet, and desktop.
-
Save your changes
Click Save (top right) as you work. Use the eye / preview icon to see the page as an attendee would, and undo/redo to step back and forward.
Manage existing pages
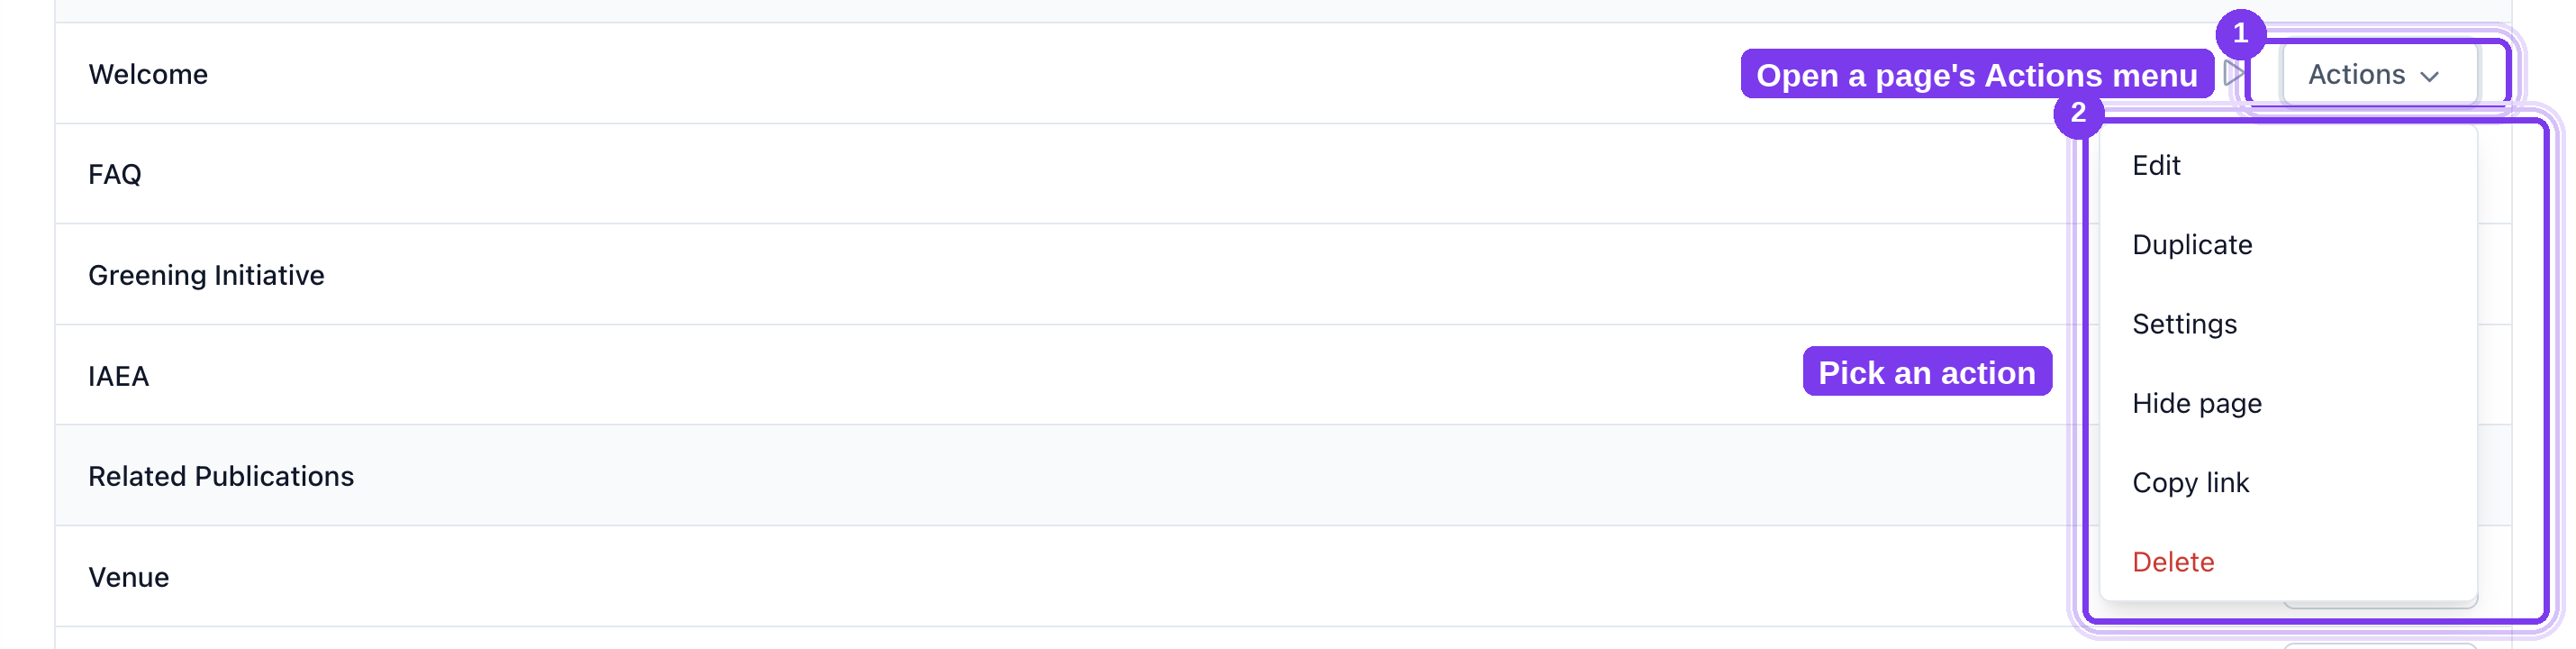
On the Website pages list, each page has an Actions menu with these options:
- Edit — open the page in the editor.
- Duplicate — create an identical copy to reuse or adapt.
- Settings — open the page's settings (title, options, visibility).
- Hide page — keep the page but remove it from the live site.
- Copy link — copy the page's direct URL to share.
- Delete — permanently remove the page.
The small play/preview icon next to each page opens a quick preview of that page.
Preview and publish
When you're happy with your pages, use Preview (top right) to review the whole site, then Publish to push your changes live. Until you publish, edits are saved but not visible on the public event site.
Still need help? Reach our team and we'll get you sorted.
Contact support →